This guide on how to use a compass and map should be enough to get you started and give you the confidence to use the skills for yourself in the hills
As a schoolboy, I was lucky to learn how to use a compass and map. I then spent the best part of two decades putting these basic skills to use throughout the British countryside, without ever really having them tested.
It wasn’t until a white-out on top of Scotland’s Ben Nevis during a winter mountaineering course that I really learnt how critical these skills are. Luckily for us (or rather thanks to the course’s well-planned itinerary), we had spent the previous day refreshing our navigation skills in a less hostile environment.
Atop the stony plateau of Britain’s highest mountain, amid terrible weather, unable to see more than a metre or two ahead, my team and I were able to navigate our way off the mountain safely and avoid wandering down one of its infamous and deadly gullies.
It had been a thrilling day, but I was very grateful for the refresher day building on what I’d first learnt as a schoolboy many years prior. These skills even come in use when navigating underwater – largely, the same rules apply.
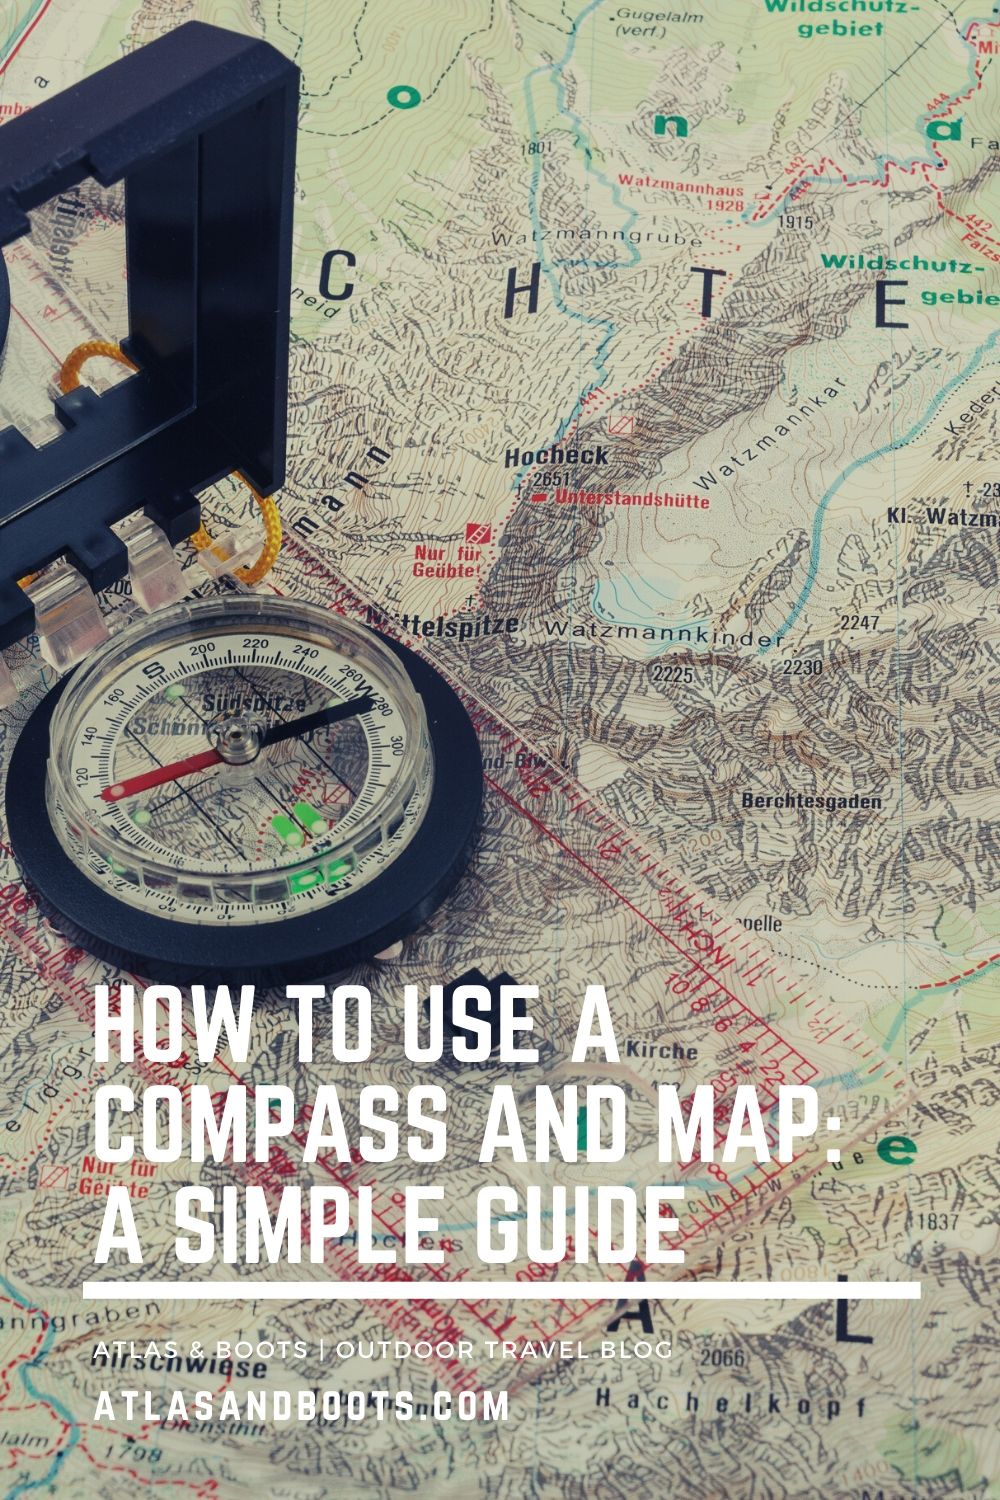
How to use a compass and map
With this in mind, I’ve written the below guide on how to use a compass and map. This should be enough to get you started and, with a little bit of practice, give you confidence on more adventurous expeditions.
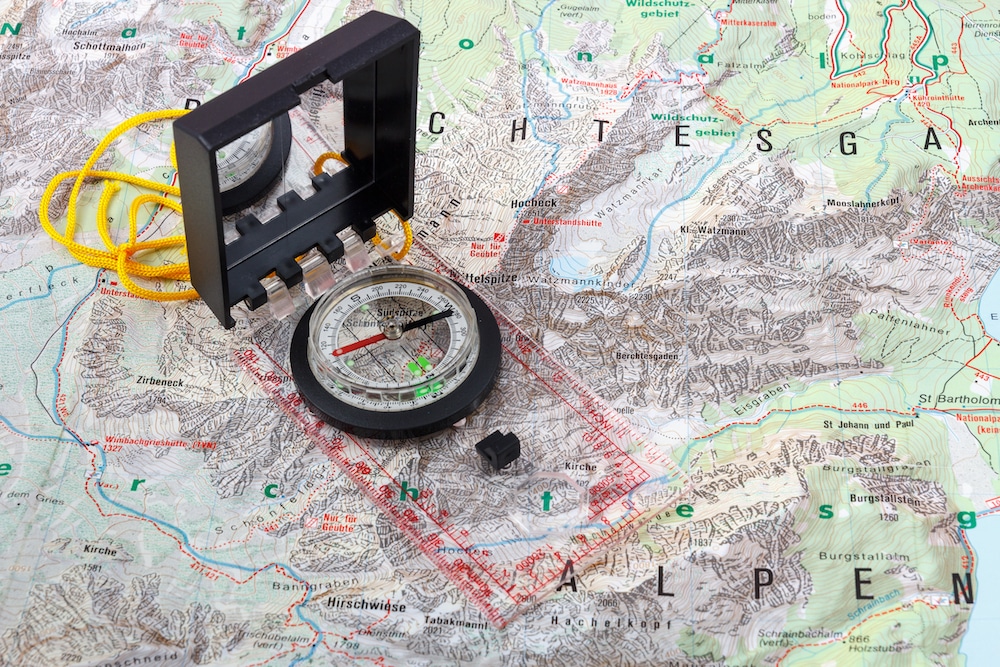
Compass features
First things first, you need to know the different features of the compass and their purpose.
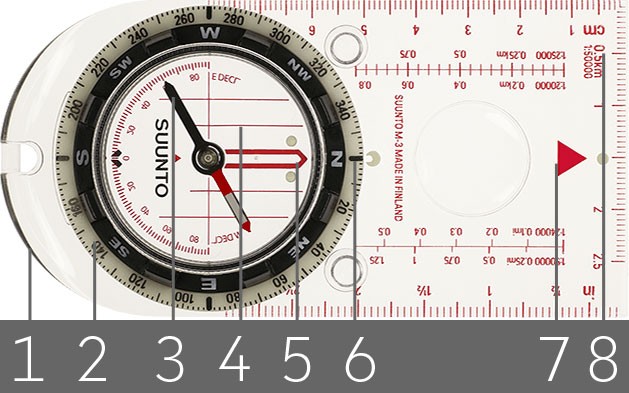
- Base plate: the transparent plastic base.
- Bezel / compass housing: the grooved ring encompassing the compass needle. It usually has a mark every two degrees covering 360 degrees as well as the four main compass points (N-S-E-W).
- Compass needle: the red end on any compass will always point north. It floats on liquid so it can rotate freely.
- Orientating / compass lines: the lines on the bottom of the baseplate.
- Orientating arrow: fixed and aligned to north inside the bezel / compass housing.
- Index line: basically an extension of the direction of travel arrow (7) and is fixed within the outer edge.
- Direction of travel arrow: the big arrow at the end of the base plate.
- Map & compass scales: 1:25,000, 1:50,000 and metric measurer (known as Romer scales).
Finding north
North is north, right? If only…
Over short distances the following is not so important as it will make little difference. However, there is a difference between magnetic north on the compass and grid north on your map.
This varies in different areas of the world, so depending on where you are and the distance you are covering, be prepared for it to affect your navigation.
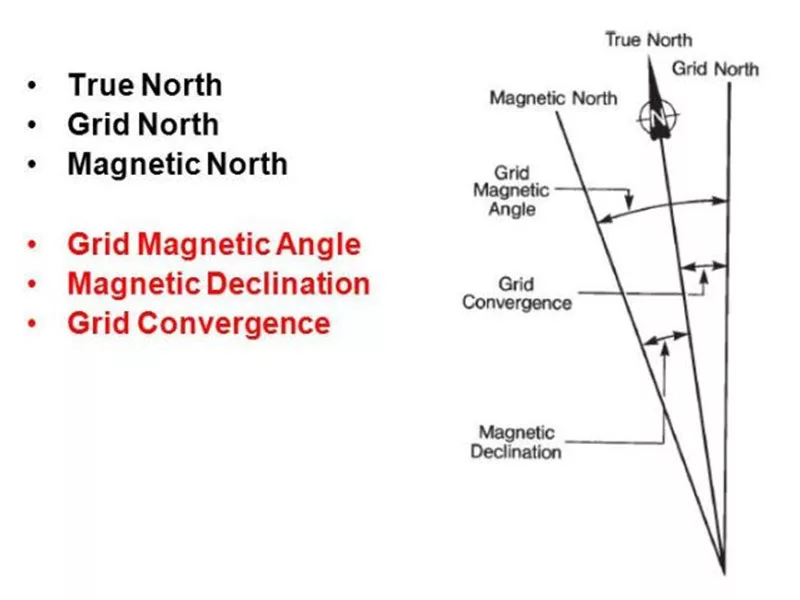
There are in fact three different Norths!
- True North: The geographical north (where the ‘North Pole’ is) defined by the rotation of the Earth on its axis.
- Grid North: The north where the grid lines on your map point (the top of the map).
- Magnetic North: This is where your compass points. The magnetic north moves slowly at a variable rate.
The needle on your compass always points to the magnetic north. Information about this ‘magnetic declination’ is usually printed on hiking maps such as Ordnance Survey’s, which will tell you how much to account for.
In most of the UK, the difference is roughly two degrees, so you should adjust your compass by turning the bezel anticlockwise two degrees. You may wish to mark this point with tape or a marker.
In some parts of the world the difference can be as much as 20 degrees. Make sure you know the magnetic declination in the area you’re hiking and if your map doesn’t have it, get a better one!
Uses of a compass
There are four main uses for a compass:
- Your heading: know which direction you are travelling in.
- Set the map: align or orientate your map with your surroundings.
- A bearing: determine which direction a feature or destination lies in relation to your location.
- Follow a bearing: to follow a straight line of travel.
Know your heading
- Hold the compass out in front of your chest with the direction of travel arrow pointing in the direction you’re heading.
- Rotate the bezel so that N aligns with the red end of the compass needle.
- The number (in degrees) on the rim of the bezel at the index line is your heading.
Set the map
You need to set the map with your compass, aligning it so that it corresponds to the surrounding landscape. This makes it easier to relate what you see on the map with what you see on the ground.
- Lay the map out flat in front of you.
- Put the compass anywhere on top of the map.
- Turn the map and compass until the needle on the compass aligns with the north-south grid lines on the map. The red end of the needle must be pointing to the top of the map.
Take a bearing
- Find a feature on the map that you want to head towards.
- Identify this feature on the ground.
- Lay the compass on the map so that orientating lines on the compass point align with your route towards the feature on the map.
- Without moving the map or compass rotate the bezel so that the orientating arrow points towards north on the map – the number (in degrees) on the rim of the bezel at the index line is the bearing you need to follow.
- Remove the compass from the map and hold it with the direction of travel arrow pointing straight away from you.
- Rotate your body, including the compass, until the red end of the needle lies within the orientating arrow.
- The direction of travel arrow should now point towards the feature or destination – that’s the bearing you’re going to follow.
Follow a bearing
- Follow the direction indicated by the direction of travel arrow until you reach your feature or destination.
- Continue to check your bearing along the way by constantly checking your direction of travel needle.
- If possible identify features on the ground which are on your direction of travel and on your map.
video playlist
This comprehensive series of videos from Ordnance Survey on how to use a compass and map and other aspects of navigation is one of the best I’ve seen.
More resources
- Beginners guide to using a compass, Ordnance Survey
- The Mountaineers Ten Essentials
- Ramblers UK navigation section
- REI navigation basics (part of REI’s series on navigation)
- Mountaineering: The Freedom of the Hills
- Navigation in the Mountains: The definitive guide for Hill Walkers, Mountaineers & Leaders is the official navigation book for all Mountain Training schemes (Mountain Training Handbook)
- Be Expert with Map and Compass: The Complete Orienteering Handbook
Enjoyed this post? pin it for later…