A comprehensive but concise guide on how to start a travel blog, covering both technical and editorial aspects of creating, maintaining and growing a blog
At Atlas & Boots, we are periodically approached for advice on how to start a travel blog. To help future bloggers, we have put our knowledge into a comprehensive but concise guide below.
How to start a travel blog: technical
Our professional guide covers not only the technical aspects of how to start a travel blog but also the editorial, helping you to plan, maintain and grow your blog in a professional way. Without further preamble, let’s begin.
1. Choose your brand name
To start a travel blog, you must first choose a brand name based on your blog’s niche. Atlas & Boots is an outdoor travel blog but there are many niches to choose from: luxury, budget, female travel, solo travel, honeymoons, accessible travel, travelling with pets, silver surfers, couples, families, LGBTQ+, food, faith, group, volunteer, eco, overland, business, architecture, history, fashion, cruises and photography.
Once you decide on a niche, think of a range of names using the methods below.
Personal name: Many entrepreneurs choose to start a travel blog based on their own name. In fact, this applies to not only one-person bloggers like Nomadic Matt and Wandering Earl but also renowned businesspeople like Disney, Ford and Chanel. This is a great way to add a personal touch but as a rookie blogger, be warned that it may be difficult to brand yourself as a professional site.
If you do choose this option, avoid Nomadic, Adventurous, Vagabond and Wandering as they are already associated with established travel bloggers. For originality, avoid Travels, Backpacker, Globe and Journey too.
Descriptive: This describes exactly what a brand is about (e.g. A Luxury Travel Blog, Solo Traveler). Using this option to start a travel blog can be good for SEO as it caters to specific search terms, but also runs the risk of being too generic. If you choose something more specific, avoid references to your age, occupation or location (e.g. kiainkorea.com) as you may outgrow these.
Symbolic: Whether it’s a map, compass or atlas, symbols and metaphors offer a creative way to find a unique name for your travel blog.
Arbitrary: Perhaps the most well-known example of this is Apple. Apple. Nothing whatsoever to do with technology. It’s a bold option as it doesn’t immediately convey what you’re about but worth exploring nonetheless when you start a travel blog.
Altered: These names sound like words but aren’t really; they’re simply extended or altered versions (e.g. Spotify, Quizlet).
Invented: These are completely made-up names (e.g. Exxon). Like arbitrary names, it may be difficult to convey your brand meaning but can be an effective way to find a unique name when you start a travel blog.
Blended: A combination of two separate words (e.g. Facebook).
2. Register your domain
Once you have a selection of names for your travel blog, check Gandi to see if the .com domain is available.
Once you have searched for and found an available .com, you can register it through Gandi or register it through your host (see step 3) which is easier for non-technical bloggers as everything is controlled from one place.
Before you proceed, it’s important to check social networks and register your handle if available (on Facebook, Twitter, Instagram, TikTok and Pinterest). A .com domain and social handles are important for strong branding when starting a travel blog.
3. Set up hosting
We use Flywheel to host our travel blog. We highly recommend them but also recognise that the specifications are far higher than what is needed for a new blog.
If you’re after an easy set-up, we recommend SiteGround which we use for our side projects. They are a WordPress-recommended hosting company and have a simple installation process.
- Go to SiteGround and choose the correct package for you. The StartUp will be enough to start a travel blog.
- Select ‘Register a New Domain’ and enter the domain you decided on in step two.
- Enter your account information and complete registration.
4. Install WordPress
For SiteGround, simply follow the SiteGround Wizard to Install WordPress.
When asked you where you’d like to install WordPress, choose your domain (http://www.nameofblog.com). Once the process is complete, note down to access your WordPress dashboard, usually like so:
URL: http://www.nameofblog.com
Admin URL: http://www.nameofblog.com/wp-admin
Username: yourusername
Password: yourpassword
You can now click the Admin URL and log in using the username and password.
5. Install a theme
There are thousands of WordPress themes to choose from. We launched Atlas & Boots with a photography theme called Incidental before switching to a more minimal editorial-focused one. We recommend GeneratePress, a lightweight WordPress theme that focuses on speed, stability and accessibility
Alternatively, you can find innumerable free themes by searching on Google. These generally work well but be warned that the level of support will likely be less reliable than professional themes which offer direct access to their developers. Whichever route you take, choose a responsive theme (i.e. one that adapts to mobile and tablet screens) for your travel blog.
To install a theme:
- Download the zip file into a folder.
- In your WordPress dashboard (http://www.nameofblog.com/wp-admin), click ‘Appearance’ and then ‘Themes’ in the left-hand panel.
- In the central part of the window, click ‘Add New’.
- Click ‘Upload Theme’, then ‘Choose File’ and select your zip file.
- Once the new theme appears in the Themes selection, hover over it and select ‘Activate’. It won’t ask you again so make sure you want to do this!
6. Install core tools and plugins
Tools
- Google Analytics: Set up an analytics account if you don’t already have one and add a tracking code to your site. We advise using the ‘Add tracking using Google Tag Manager’ method as it will make future changes easier. If you just want to get up and running, however, you can use ‘Add the tracking code directly to your site’.
- Link checker: We recommend checking for broken links once a month. On Windows, you can do this using Xenu Link Sleuth. On Macs, use Integrity.
- Filezilla FTP: Professional bloggers will need FTP access to their site. Install Filezilla and set up access (see relevant instructions at SiteGround). If you prefer, you can skip this step for now.
Plugins
Our list of recommended plugins with which to start a travel blog are below. To install a plugin, go to your WordPress dashboard (http://www.nameofblog.com/wp-admin). Click ‘Plugins’ on the left-hand panel and then ‘Add New’. Search for the relevant plugin, install it and activate it.
- UpdraftPlus: Backs up your WordPress database.
- Substack: Allows you to embed an email subscription form on your site. Substack requires no heavy plugins and is uncluttered and simple to manage.
- Akismet Anti-Spam: Provides anti-spam protection to block spam comments and spam in a contact form.
- Content Views Pro: Filters and displays content into responsive layouts such as interactive galleries and carousels.
- Related Posts: Allows you to surface related posts based on what a reader is looking at.
- Yoast SEO: Helps you optimise your pages for search engines.
- JetPack and Akismet: These two plugins are sometimes packaged with new WordPress installs. The first gives you access to WordPress’s more sophisticated features. The second protects your travel blog from spam. If you can’t see them in your plugins list, go ahead and install them.
- Imagify: Optimises your images on upload and creates WebP versions.
- Web Stories: Comes with a range of templates for creating visual stories of your content for the web.
- TablePress: Easily add, edit and manage tables which feature sorting, pagination and searching.
How to start a travel blog: editorial
Phew. Now that the technicals are in place, let’s move on to editorial. The first step is to set up an editorial calendar. At Atlas & Boots, we blog two times a week and use Google Docs to plan a month ahead.
7. Prepare an editorial calendar
One of the joys of travelling is spontaneity but travel blogging is easier with a bit of planning. If you know what angle you’ll take on a specific city or attraction, it will help you find the right details while you’re there. For example, if you decide to write a piece on the best day trips from Yerevan or a walking tour of Longyearbyen, you can make sure you visit the places you hope to mention and get all the information you need while there. Researching after your visit will be harder.
8. Create a pro-forma to record details
At the beginning of our trip, we often found ourselves asking things like “Hey, do you remember how much that ferry ride from Savusavu cost?” or “What was the name of that restaurant we went to in Port Vila?”
Writing a post weeks after an event can be tricky if you don’t note down salient details. To maintain consistency and genuine usefulness, consider creating a pro-forma to cover transport, accommodation, restaurants and sights (what is it, where is it located, what are the departure and arrival times and locations, when does it take place, how much does it cost, how can you book tickets, what tour companies can help and so on).
This will be a huge help when you come to write up your trip reports on your travel blog. We know that diligently scribbling down details doesn’t quite chime with the fun and free-spirited ethos of travel but no one said travel blogging was easy.
9. Videography
Video content can add an exciting and engaging element to your travel blog. Make sure that you choose a reliable video editing tool such as Final Cut Pro, Adobe Premiere/Rush and iMovie (which comes free with any Apple computer.
Online alternatives such as FlexClip have some really handy features when it comes to creating social media content. We particularly like the subtitles option, which allows for adding subtitles manually, auto-transcribing or uploading a subtitles file.
If you want to go a step further, an AI video generator like VEED can turn scripts or prompts into polished travel videos complete with voiceovers and captions – a useful option for bloggers who want to produce engaging video content without extensive editing skills.
In addition to the above, we also use another online video editing platform called Ssemble Shorts Maker to create YouTube Shorts clips automatically from the most popular segments of our videos.
If you opt to include videos in your travel blog, aim to include the process in your planning. Having an editorial calendar that includes video creation can help you determine what to shoot as well as where and when. You can also use the calendar to schedule video editing and publishing.
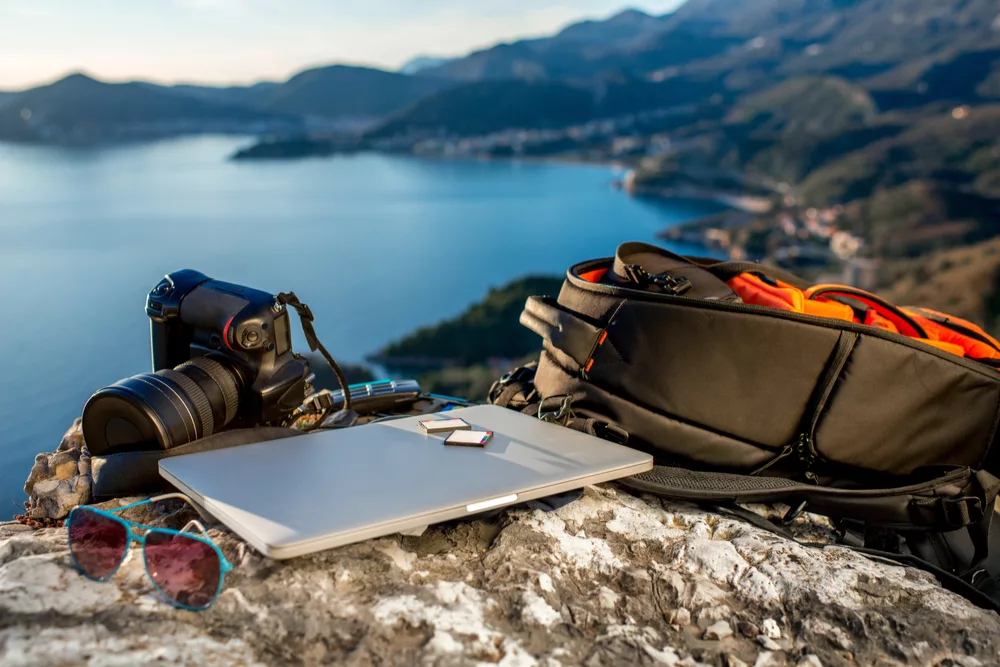
10. Invest in good photography
Peter’s penchant for snorkelling, diving, jumping into waterfalls and being generally cavalier has seen the destruction of one digital camera, two GoPros and several phones. Despite this, we will continue to invest in photography equipment because imagery is so important in doing justice to destinations. For a deeper dive, read our travel photography gear guide.
If you can’t yet afford a good camera or – like me – are a hopeless photographer, consider investing in good stock photography instead. Shutterstock has over 247 million royalty-free images and offers monthly packages to suit all budgets.
We’ve used Shutterstock to sell Peter’s stock photography as well as to source other imagery we may need on the blog. The Shutterstock Editor is particularly useful for creating custom web banners and bespoke social media posts.
When it comes to creating graphics, we recommend Canva. It’s easy to use, particularly for making social media graphics, web adverts and presentations.
11. Write well and read, read, read
An accusation often levelled against blogging is that it’s not real writing.
“Blogging isn’t writing; it’s graffiti with punctuation”.
— Kia Abdullah (@KiaAbdullah) November 6, 2011
Much of the time, it isn’t even that.
It’s inevitable that mistakes will creep into writing but so many travel blogs have a lazy editorial philosophy. It’s not rare to find inconsistent capitalisation, typos that could have been caught with the lightest spellcheck and trip reports riddled with clichés. It may be that this bothers me (a former print subeditor) more than most* but if you want to create a professional travel blog, you need to write quality content.
Here are some starting points:
- Read, read, read – preferably travel books.
- Seek out award-winning writing and read as much of it as possible. The Pulitzer Prize for Feature Writing is a good place to start.
- Read On Writing by Stephen King to understand the different levels of writing skill and identify where you fit in (bad, competent, good, great). Work hard on improving.
- The Guardian’s tips for travel writing are also worth a read.
- Also, read blogs across different niches – whether news, fashion, food, fitness, parenting, lifestyle, or student blog writing – since each offers transferable skills and techniques you can apply to your own blogging.
- Avoid travel clichés where possible (admittedly, it often isn’t). This list from Fodor’s is a good place to start.
- Use a proofreading and grammar-checking tool such as Grammarly to catch errors and improve your writing.
(*It bothers me no end that Atlas & Boots has switched currencies between GBP and USD in past articles. We will fix this one day.)
How to start a travel blog: the final word
If you write it, people won’t just come. Marketing is a necessary evil and you must actively promote your posts. You must set up your email subscription list as soon as possible and you must focus efforts on growing your social channels. At Atlas & Boots, we read marketing blogs Buffer, CopyBlogger, Moz and QuickSprout to stay up to date on how to promote and grow our blog. Stay consistent in your schedule and don’t give up.
Good luck and make sure you come back and tell us how you’re getting on.